Employees
Use the Employees back office application to manage employees.
All users who work for your company—both employees and contractors—are considered employees in VOGSY. You can populate your account teams and project teams with employees, as well as add them to your deliverables and resource planning.
|
External employees, such as contractors who have used their own email address to join VOGSY at your invitation, are listed with a badge ( |
You can assign an employee one or more roles.
You can also configure their working hours, rates, billability percentages, and department membership.
This topic explains how.
Create an employee
By default, all users of your company’s domain have access to VOGSY.
| The User management back office settings page lets you deny access to VOGSY to your company’s domain users who are not active employees. |
There are two ways to create an employee:
-
Automatically: VOGSY will create the record when a user without an active Employee record logs into VOGSY for the first time. This newly created employee will be assigned the Professional role.
After a user logs in for the first time, someone with the Support staff role should open the new user’s Employee record and fill it out. Be sure to fill out the Companies/departments, Rates, Working hours, and Billability percentages sections so that the employee’s hours can be submitted and approved.
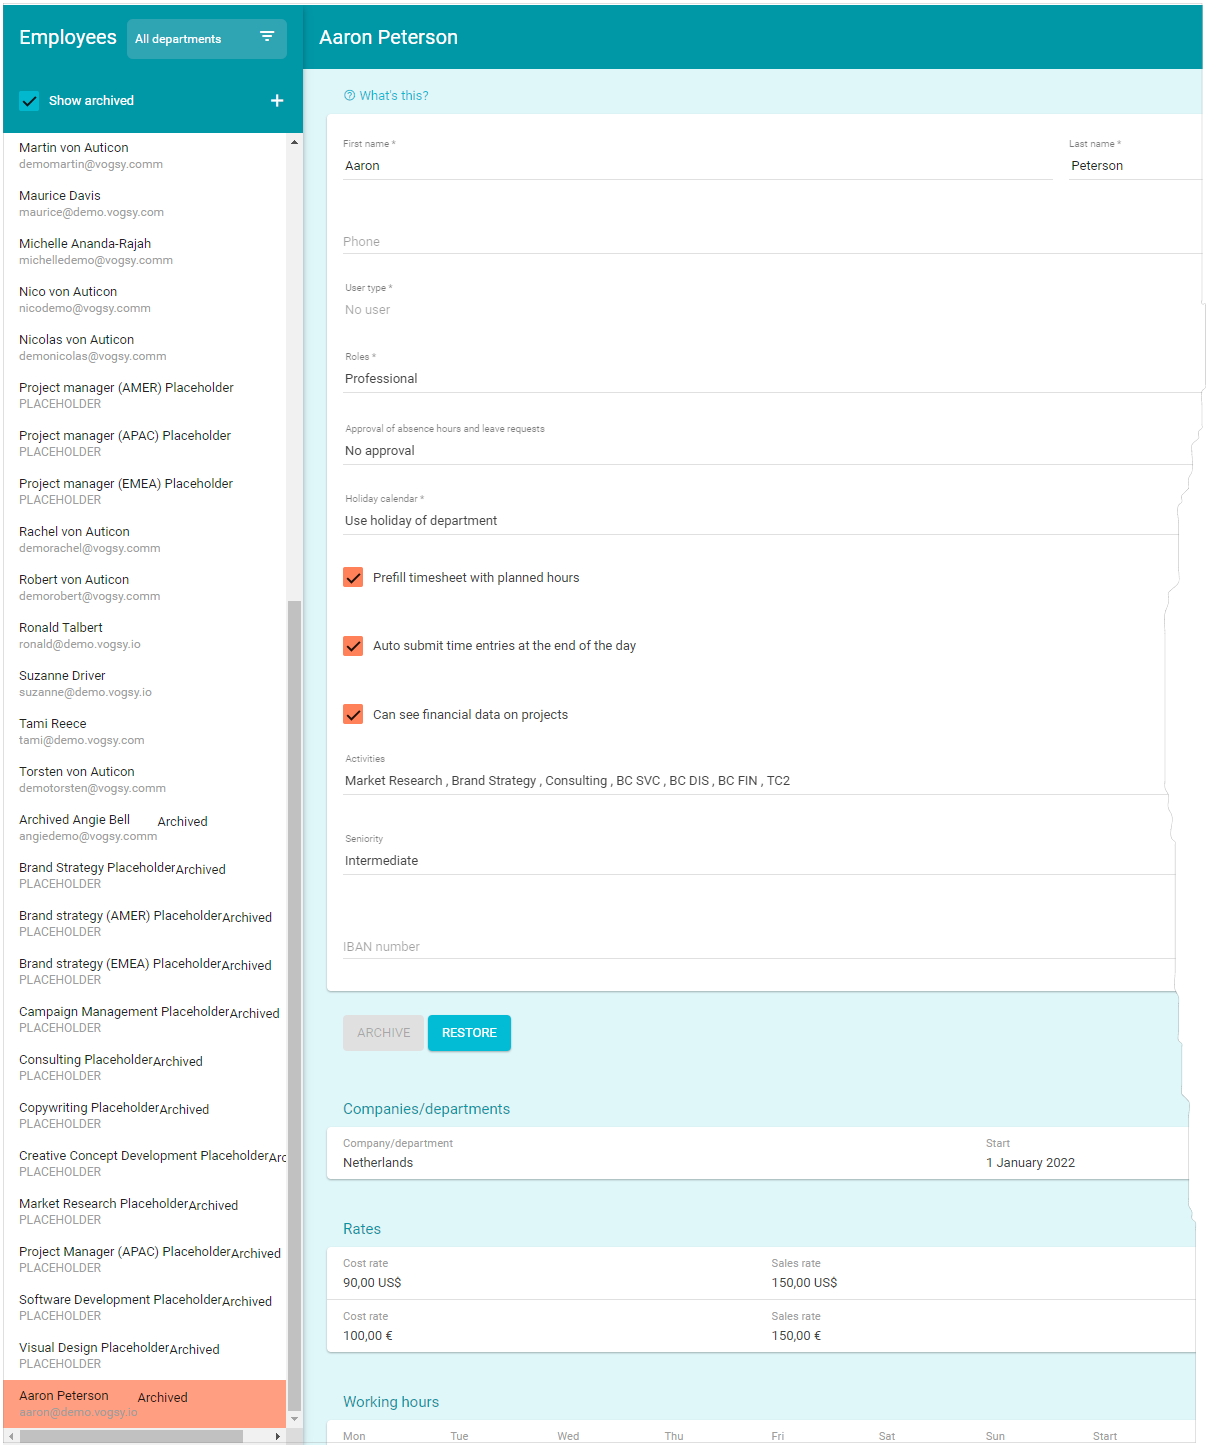
Settings
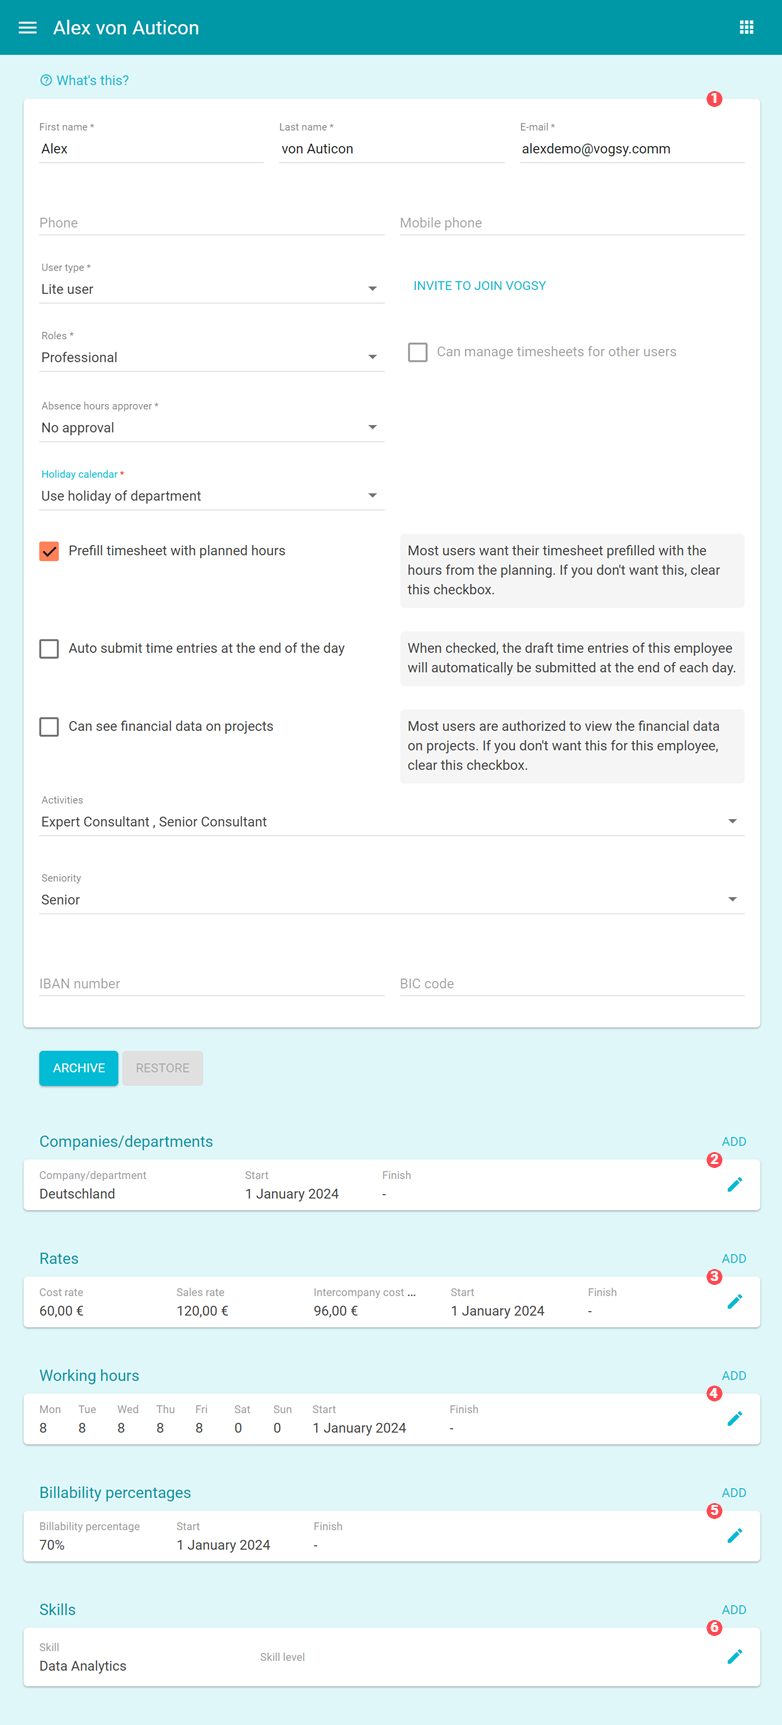
|
Basic settings. In the top section of the right panel the basic setting of the employee can be set:
|
|
Companies/departments. In this section you can configure to which department the employee belongs over a specified period of time. The department of the employee is used for planning resources and for monitoring the department’s performance (billability). It is also used for processing project costs for spent hours. For more information, see Add a company or department to an employee page. |
|
Rates. You can specify the sales and cost rates for each employee. The cost rate is used for calculating project costs. When time entries are approved: the actual costs are calculated using the cost rate of the employee and are allocated to the project. The sales rate is used for calculating the target of billable hours in monetary values. The Intercompany cost rate is the employee’s hourly rate for when they perform work for a company other than their 'home' company. This rate is only available if you have set up multicurrency. If the multicurrency feature has been activated, then the rates displayed here will be based on the local currency of the employee’s company. For more information, see Add a rate to an employee page. |
|
Working hours. Here you specify the number of hours an employee can work for each day of the week. Working hours are used for resource planning in the following manner:
For more information, see Add a work schedule to an employee page. |
|
Billability percentages. In this section, you specify the percentage of working hours for which the employee should be billable. The billability percentage is used for monitoring and reporting the billability per employee and the billiabilty per department. For more information, see Add billability percentages to an employee page. |
|
Skills. In this section, you add this employee’s relevant professional skill along with their experience level at the skill. For more information, see Add skills to an employee page. |

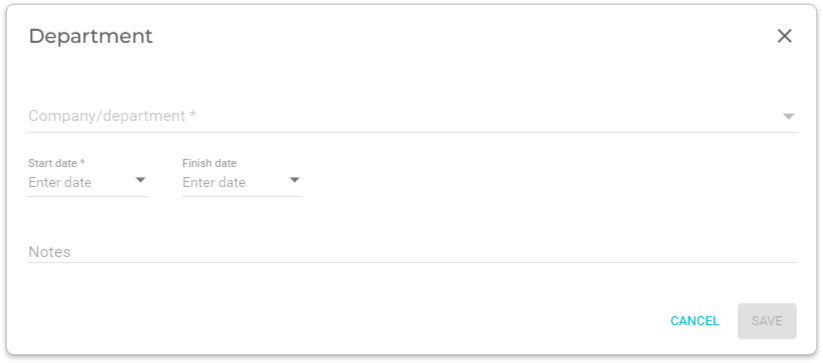
Add a company or department to an employee page
-
Click Add. The Department form displays.
-
Fill out the form.
If the company or department you are looking for is not listed in the Company/department drop-down list, you can add it via the Companies/Departments settings in the back office. -
Click Save.
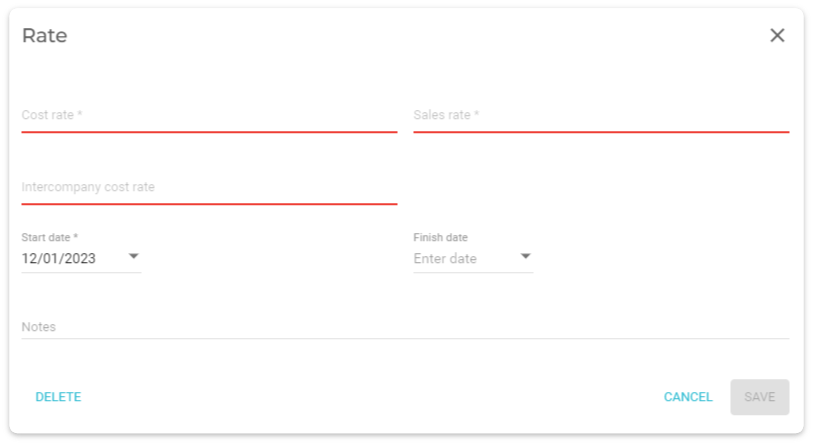
Add a rate to an employee page
| If the multicurrency feature has been activated, then the rates that you enter here should be based on the local currency of the employee’s company. |
-
Click Add. The Rate form displays.
-
Fill out the form.
The cost rate is the same as the employee’s hourly rate; the sales rate is the amount that you charge the customer for the employee’s services. Also, you must enter a start date but an end date is optional. The Intercompany cost rate is the employee’s hourly rate for when they perform work for a company other than their 'home' company. This rate is only available if you have set up multicurrency. -
Click Save.
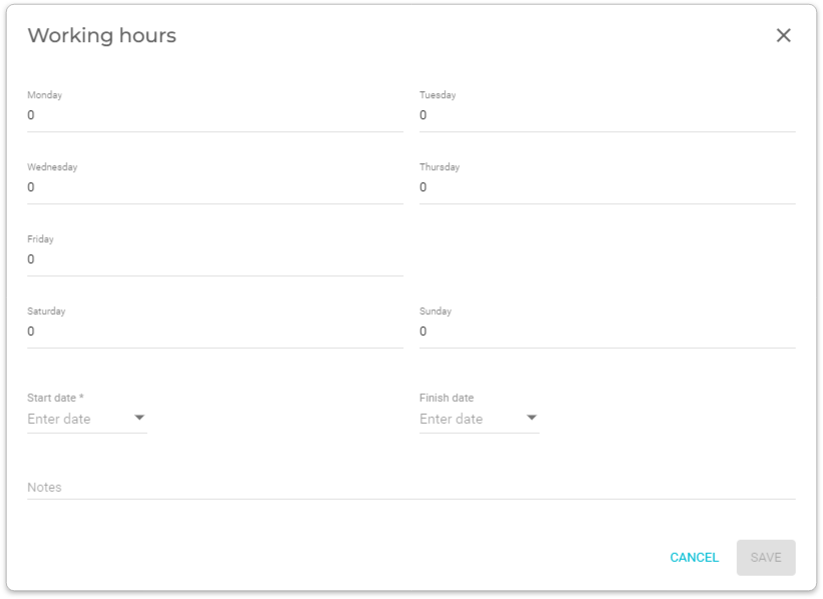
Add a work schedule to an employee page
-
Click Add. The Working hours form displays.
-
Fill out the form.
You must enter a start date but an end date is optional. -
Click Save.
Add billability percentages to an employee page
-
Click Add. The Billability percentage form displays.
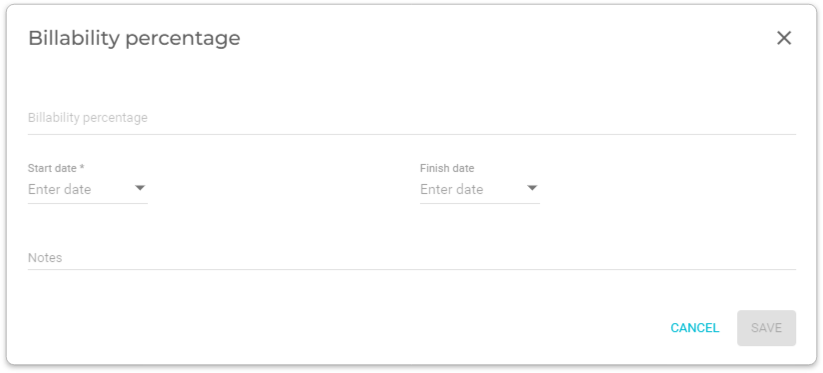
-
Fill out the form.
A billability percentage is the percentage of working hours for which the employee should be billable. Also, you must enter a start date but an end date is optional. -
Click Save.
Add skills to an employee page
-
Click Add. The Employee skill form displays.
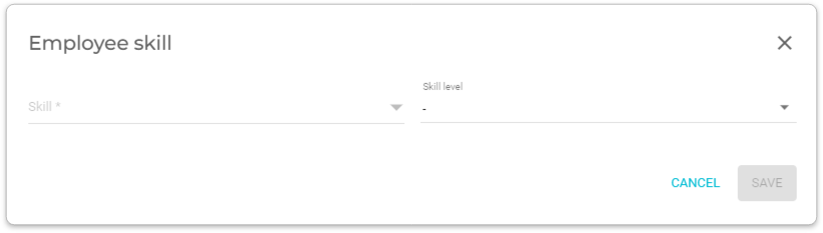
-
Fill out the form.
If the skill you are looking for is not listed in the Skill drop-down list, you can add it via the Skills master table in the back office. -
Click Save.

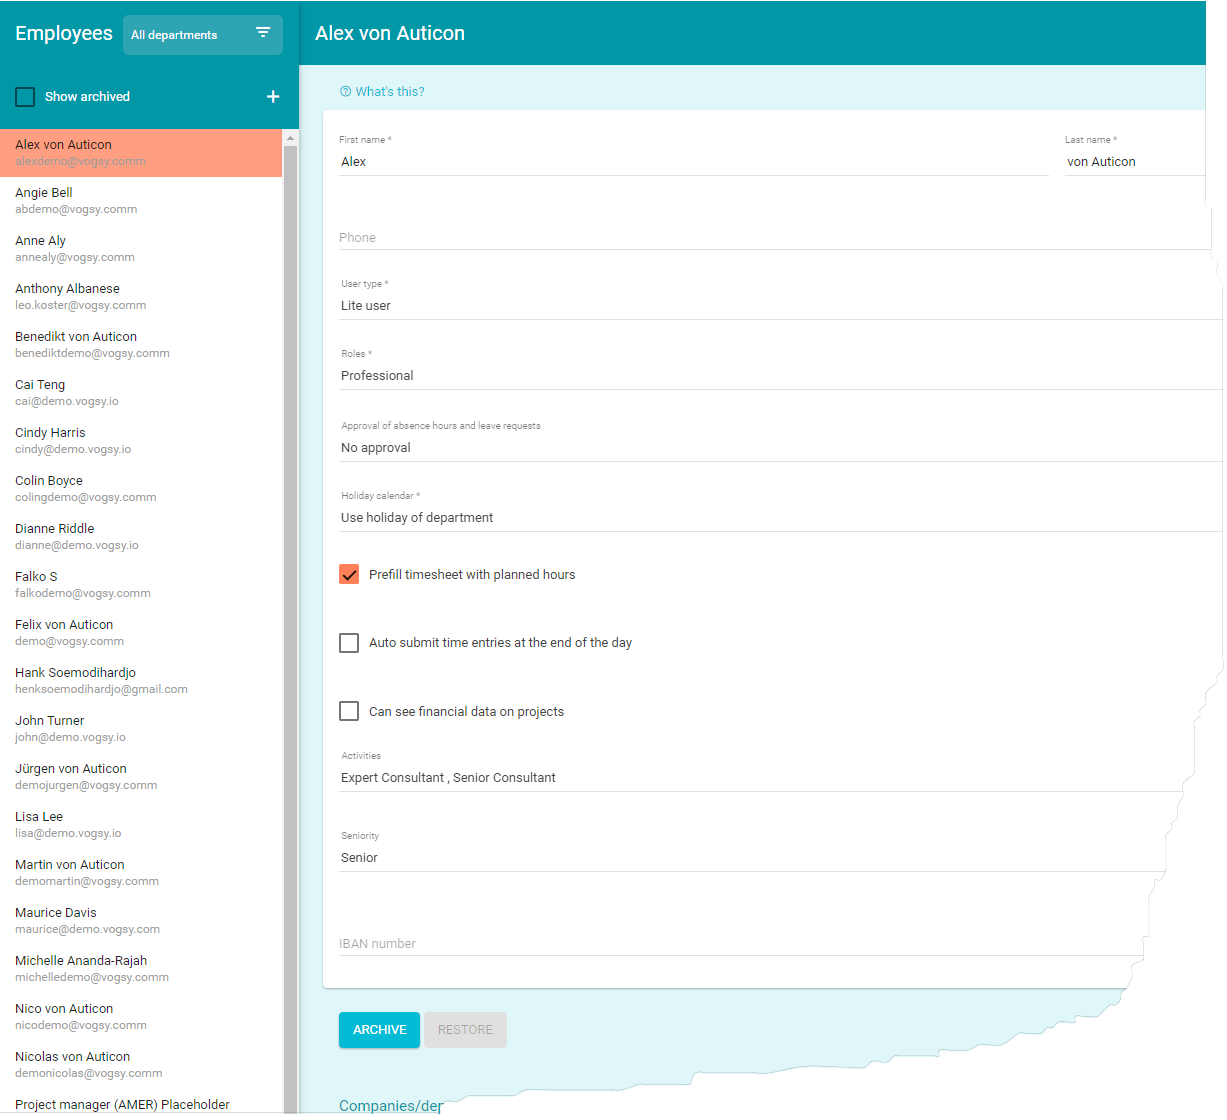
Archive an employee record
You can not delete an employee record, but you can archive it so that it is not available to be assigned to projects.
To archive an employee record, do the following:
-
Go to the Employees back office application.
You must have the Support staff role in order to access the back office. 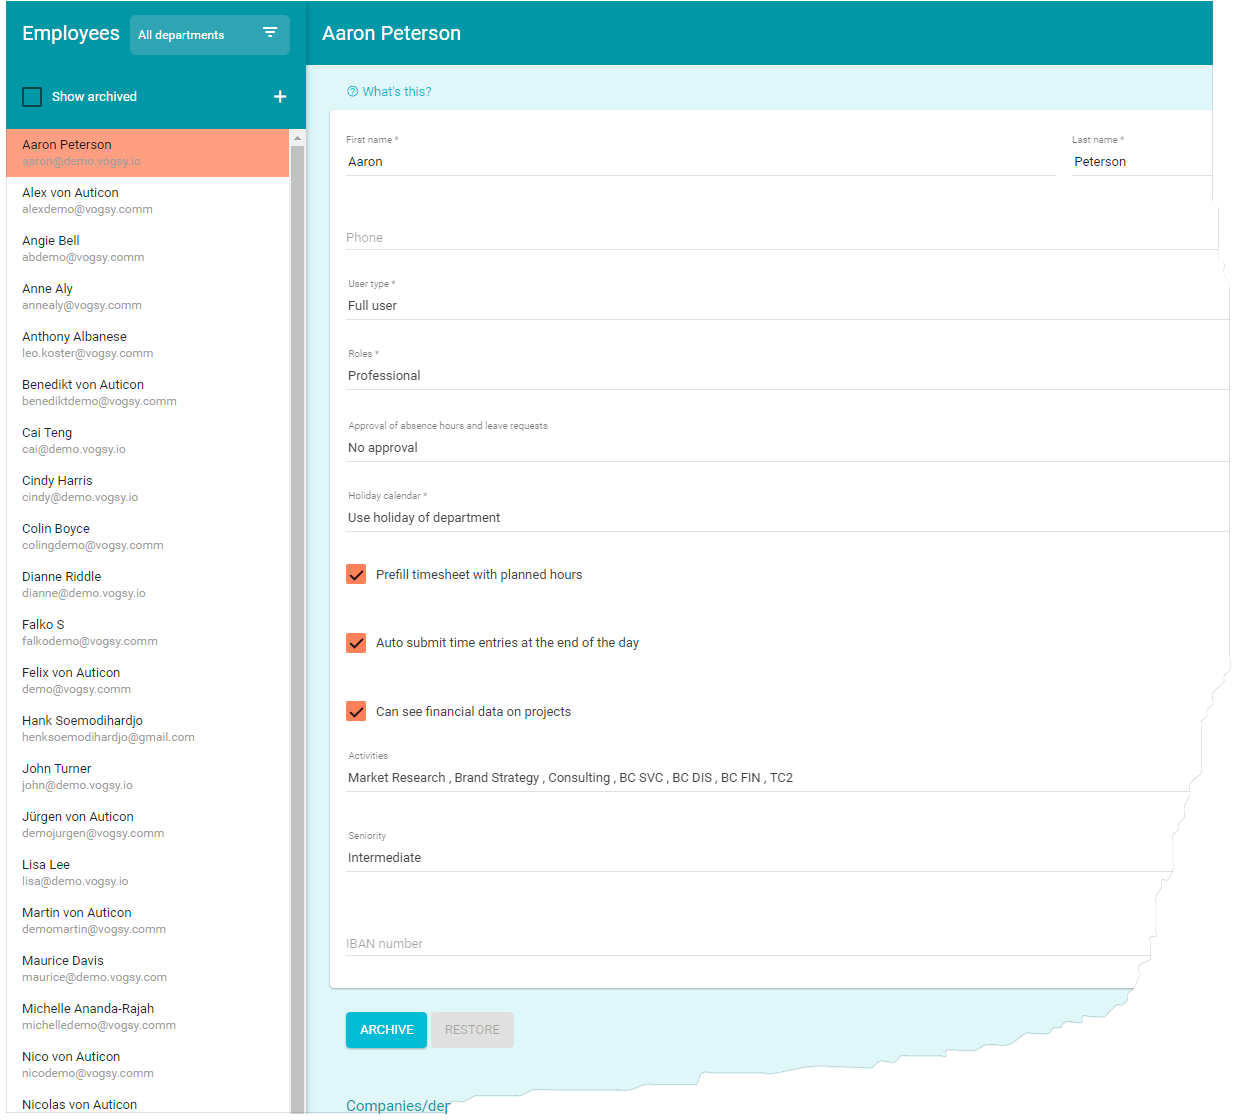
-
Select the employee record that you want to archive and click Archive. The employee record will be removed from the list on the left panel and will no longer be available.
Restore an archived employee record
To restore an employee record, do the following:
-
Go to the Employees back office application.
You must have the Support staff role in order to access the back office.
-
Select the Show archived checkbox. All archived employee records will be added to the list.
-
Select the employee record that you want to restore and click Restore. The label will be restored and is available for use on your VOGSY records.