Planning resources
The Planning Resources view displays the planned hours for every employee in your company.
The numbers displayed in the bars on the calendar view are the hours that have been planned for the day or the week.
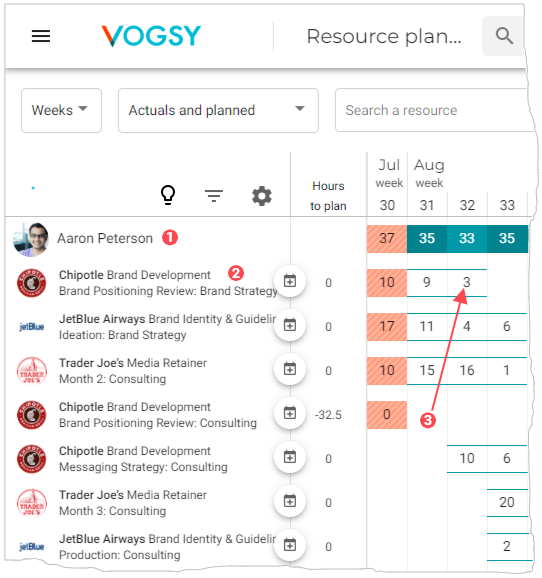
Resource planning is interactive: if you want to change a resource’s hours:
-
Find the resource (
 ) and tap their row to display their list of assigned deliverables and activities (
 ).
).Only employees who have allocated hours display on the resource planning page. -
Locate the activity whose hours you want to edit, and using, the cursor, move across the row until you locate the cell that corresponds to the week that contains the hours you want to edit.
-
Tap the cell (
 ) and a form will display so that you can adjust the hours of that person for that day/week.
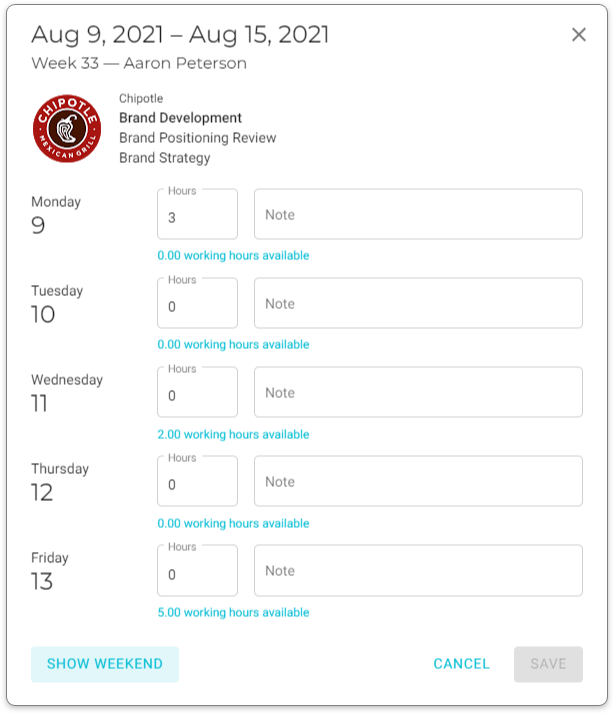
This way it is easy to swap resources and planned hours while remaining in the overview.
You can add columns of additional information via the ![]() Show extra data button. In the Week view, you can add rows of totals to be displayed above the planning.
Show extra data button. In the Week view, you can add rows of totals to be displayed above the planning.
Field descriptions
|
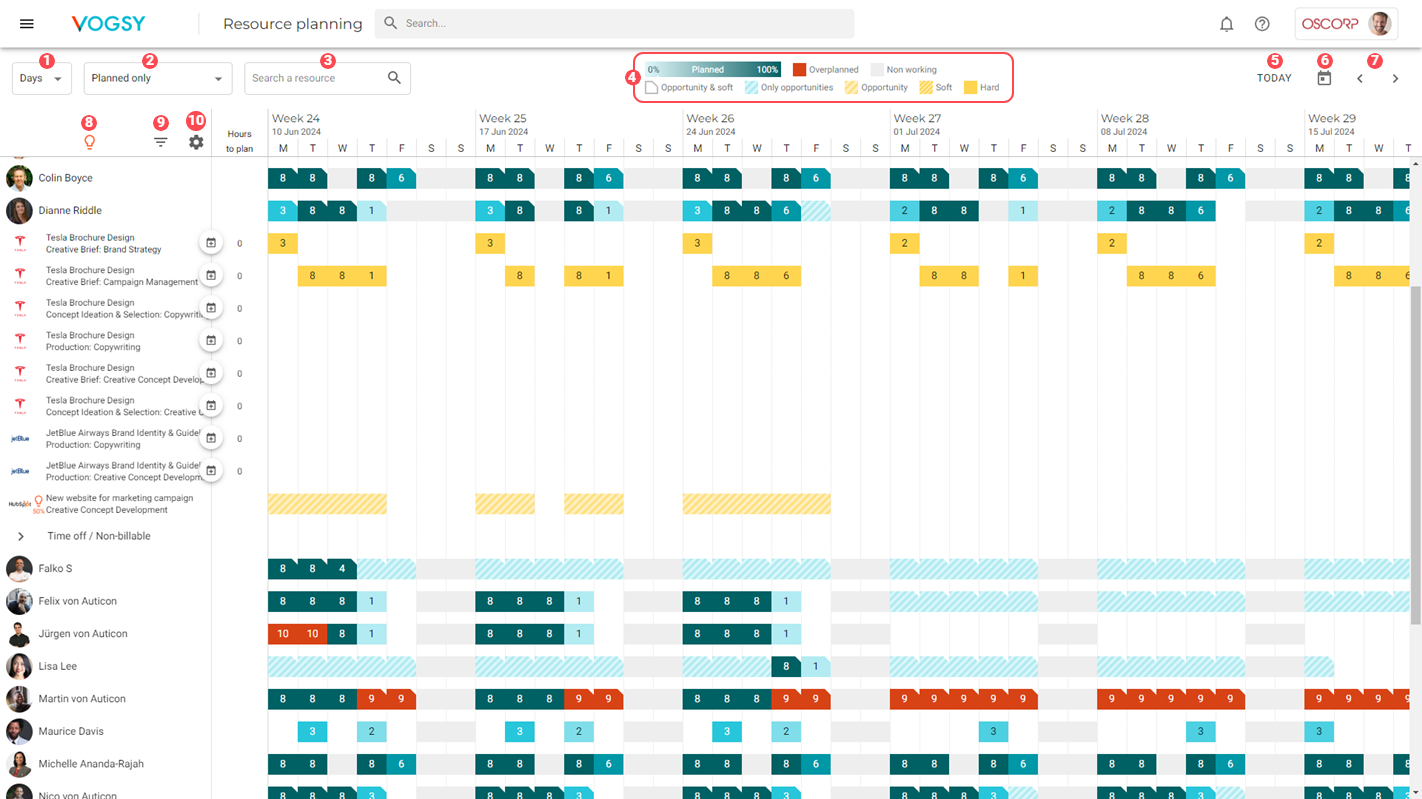
The calendar view can display by Weeks or by Days. The default view is Weeks. |
||
|
Type of hours: Actuals and planned, Available, or Planned only. |
||
|
To filter a particular resource, begin typing their name in this search field. The calendar view will change to show only selected resources hours. |
||
|
This legend explains the meanings of the different colors used in the calendar view:
|
||
|
Displays data starting from the date of viewing. If you are viewing future planning, click this button to return to current planning. |
||
|
Use this calendar selector to go to a specific day (if the calendar view is set to Days) or to the week that contains the day that you select (if the calendar view is set to Weeks). Click Today to return to the current day or week. |
||
|
Move the calendar view forward or backward. Click Today to return to the current day or week.
|
||
|
Show or hide opportunity bookings. |
||
|
Displays the Filter resources form. You can filter by the following properties: These filters apply to the resources listed in the resource planning, not the projects or activities where resources are planned. |
||
|
Selecting the |
Additional viewing options
Selecting the ![]() Show extra data button presents you with the following options:
Show extra data button presents you with the following options:
-
Select columns
-
Select totals per week
Select columns
Selecting this option opens the Select columns form, where you can choose which special columns to display.
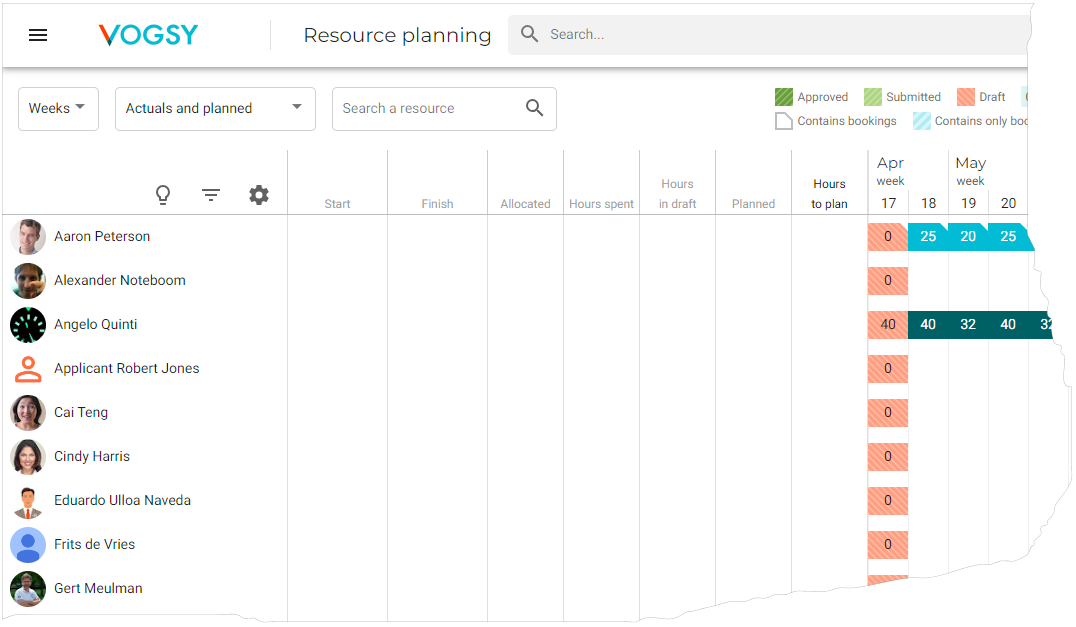
The purpose of each special column is as follows:
| Name | Purpose |
|---|---|
Start |
Lists the date on which the resource will begin work on the deliverable. |
Finish |
Lists the date on which the resource will complete the work on the deliverable. |
Allocated |
Lists the number of hours that have been assigned to the resource to complete the deliverable. |
Hours spent |
Lists the number of hours spent working on the deliverable so far, based on submitted time entries. |
Hours in draft |
Lists the number of remaining hours tentatively planned for this deliverable. |
Planned |
Lists the number of hours planned for this deliverable. |
Hours to plan |
Lists the allocated hours that remain to be planned. To plan these hours, click the |
Select totals per week
This option only functions if you have selected the Weeks calendar view (![]() ).
).
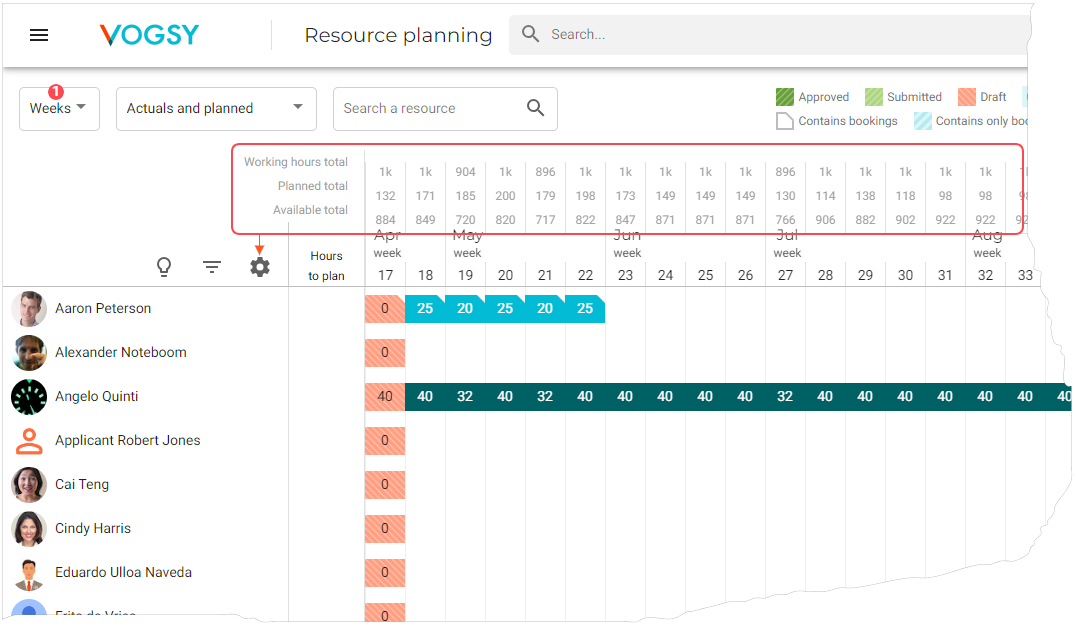
Selecting this option opens the Select totals per week form, where you can choose to display the following additional calculations:
-
Working hours total. Displays the total amount of hours, both planned and actual, for the week.
-
Planned total. Displays the total amount of working hours planned for the week.
-
Actual total. Displays the total amount of hours already worked for the week.
View all planned hours
It is possible to view all planned hours for all resources on the Resource planning page by doing the following:
-
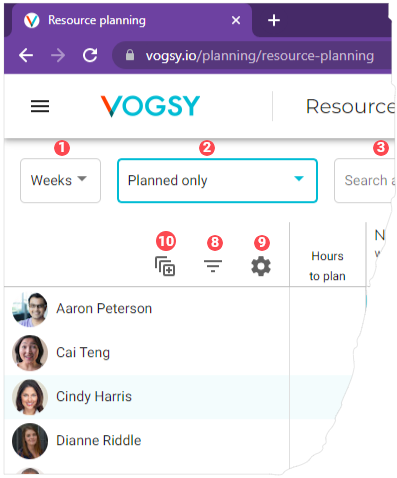
Go to the Resource Planning page and Type of hours drop-down list (
 ) to Planned only.
This feature is only available when viewing planned hours. 
A new button (
 ) will appear beside the Filter resources button.
-
Click the Expand all rows button (
 ) and the view will expand to display all of the company’s resources and their planned hours.
The resource view
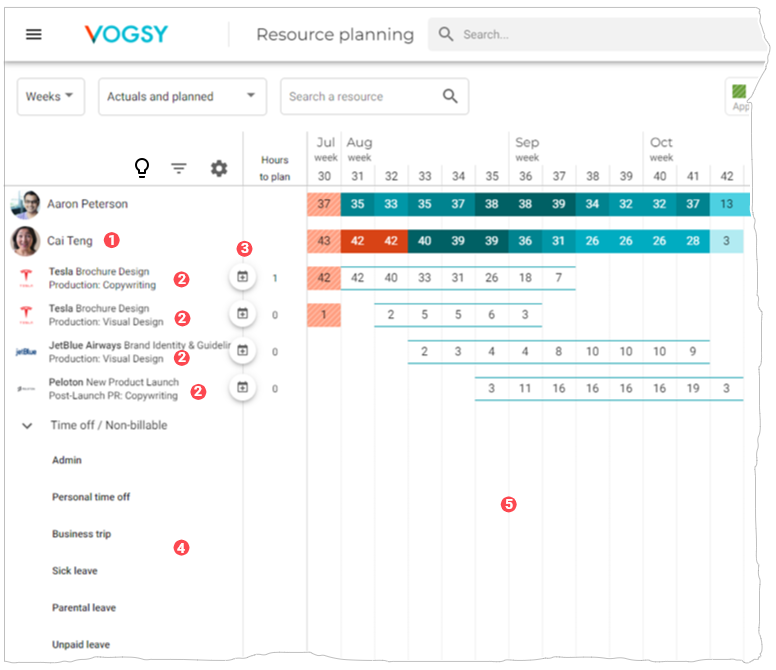
Click an employee (![]() ) to display their resource view, which lists all of the employee’s allocated activities (
) to display their resource view, which lists all of the employee’s allocated activities ( ) and non-billable hours (
 ). Planned hours for each activity displays in the calendar view (
![]() ).
).
If an activity ( ) has unplanned hours, you can use the
 ![]() Generate planning entries button (
Generate planning entries button ( ) to allocate those hours to the activity. VOGSY will also determine the finish date of the activity based on the remaining hours and the availability of the resource.
Another way to adjust hours is to click on an hours entry in the calendar view ( ). A form will display where you can update the hours.

Viewing hard bookings and soft bookings
VOGSY displays both soft and hard bookings on the Resource Planning view.
In VOGSY, soft bookings are hours that are planned on a project that has the status of Opportunity pending. Because the opportunity has not yet been won, these hours are tentative and are usually based on anticipated workloads or prospective client engagements that haven’t yet been fully confirmed. However, they also provide insight into potential resource needs and allow for proactive planning.
In contrast, hard bookings are hours that are planned on a project that has a status of New or In progress. Hard bookings definitively allocate the resource to the specific project, ensuring that they are not double-booked or over-allocated during that period.
Square, dark blue cells ( ) indicate the resource has hard-booked time for that week (or day, depending on how you are viewing the planning). To see the actual booking, click on the resource to reveal their resource view. This will display their planned hours. Cells with a dark blue top and bottom border (
 ) contain hard bookings.
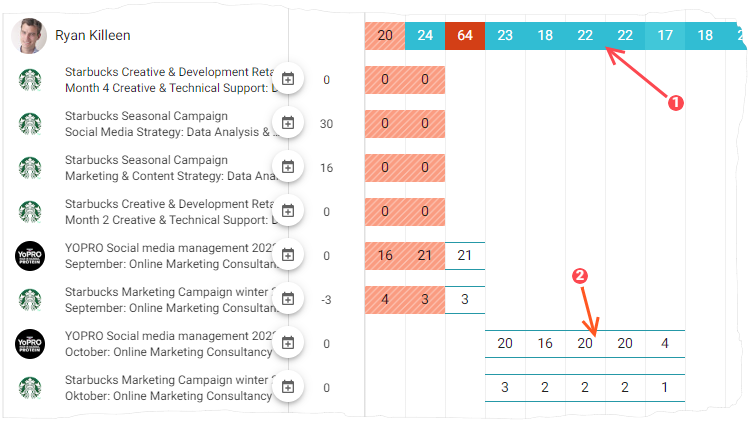
Notched cells ( ) indicate the resource has soft-booked time for that week (or day, depending on how you are viewing the planning).
To see the actual booking, click on the resource to reveal their resource view. This will display their planned hours. Cells with a light blue, dotted top and bottom border ( ) contain soft bookings.


